Introduction to S’mores Sushi Rolls
Have you ever craved that delightful combination of chocolate, marshmallow, and graham crackers but wanted to do something different? Enter S’mores Sushi Rolls! This fun twist on a classic treat is perfect for busy moments when you want to whip up something special without the fuss. I adore how easy these rolls come together, making them an instant favorite at any gathering. Plus, they’re sure to impress your family and friends, sparking smiles with every bite. So, let’s dive into this delightful adventure that combines traditional flavors with a modern, creative flair!
Why You’ll Love This S’mores Sushi Rolls
You’ll absolutely love these S’mores Sushi Rolls for their ease and speed! In just 15 minutes, you can create a visually stunning dessert that tastes like childhood memories wrapped in a modern twist. They’re no-bake, which means less time in the kitchen and more time enjoying the smiles on your loved ones’ faces. Plus, the delightful combination of flavors will have everyone asking for seconds!
Ingredients for S’mores Sushi Rolls
To create these delightful S’mores Sushi Rolls, you’ll need a handful of simple ingredients. Here’s what you’ll gather for your delicious masterpiece:
- Flour tortillas or crepes: These are the base of your rolls, providing a neutral wrapper that contrasts beautifully with the sweet filling.
- Marshmallow fluff: This gooey, sweet treat adds a rich creaminess that captures the essence of traditional s’mores in every bite.
- Chocolate spread: Whether you opt for a chocolate hazelnut spread like Nutella or melted chocolate, this layer adds that delightful chocolatey goodness that pairs perfectly with the fluff.
- Graham crackers: Crushed graham crackers bring the classic crunchy texture associated with s’mores, making each bite a satisfying experience.
- Mini chocolate chips: These are optional, but they can enhance the chocolate flavor and give your rolls extra texture. Sometimes, more chocolate is just what you need!
Feel free to experiment with substitutes, too. For a gluten-free version, you can easily swap in gluten-free tortillas or crepes. If you want to add a fruity twist, consider adding thin slices of bananas or strawberries for extra flavor. Check the bottom of the article for exact quantities and a printable version!
How to Make S’mores Sushi Rolls
Creating S’mores Sushi Rolls is a delightful adventure, and I’m excited to guide you through each step. With just a few simple steps, you’ll have a tasty treat ready to impress. Let’s jump right into the fun!
Step 1: Prepare Your Surface
First things first, let’s set the stage for our culinary creation. Clear off a clean, flat surface and gather all your ingredients. I like to lay out everything beforehand, making it super easy to grab what I need. Having a tidy workspace not only helps keep things organized but also gets me excited to start rolling!
Step 2: Spread the Marshmallow Fluff
Now, it’s time to get messy in the best way! Take your tortilla or crepe and lay it flat. Using a spatula or the back of a spoon, spread a generous layer of marshmallow fluff all over it. Make sure you leave a bit of space at the edges. This creates a nice seal, ensuring that your delicious filling doesn’t spill out. Trust me; the fluffiness is key!
Step 3: Add the Chocolate Layer
Next up is the chocolate layer. Carefully spoon your chocolate spread onto the marshmallow fluff. With another spatula or the back of a spoon, evenly spread it out over the fluff. Don’t skimp on this; chocolate is where the magic happens! A smooth, even layer elevates the flavor and balances out the sweetness of the marshmallow.
Step 4: Sprinkle with Graham Crackers
Here’s where we bring in that beloved crunch! Grab your crushed graham crackers and sprinkle them generously over the chocolate layer. Aim for even coverage to make sure every bite has that signature s’mores taste. The delightful crunch from the graham crackers will add a wonderful texture, making these rolls even more irresistible!
Step 5: Roll It Up
With all your layers in place, it’s time to roll! Start at one edge and tightly roll the tortilla or crepe into a log shape. Keep it snug but not too tight; you want those fillings to stay intact. If you notice anything peeking out, just gently push it back in as you roll. Think of it like tucking in a cozy blanket!
Step 6: Chill and Slice
Now, for the final touches! Wrap your rolled sushi in plastic wrap and chill it in the fridge for about 10 minutes. This helps them hold their shape and makes slicing easier. Once chilled, use a sharp knife to cut the log into bite-sized rounds. Each slice will reveal the beautiful layers inside. It’s like unwrapping a surprise!
Tips for Success
- Make sure your ingredients are at room temperature for easier spreading.
- Use a serrated knife to slice the rolls smoothly without crushing them.
- Chill for longer if you have the time; it helps enhance the flavors.
- Experiment with different fillings, like peanut butter or fresh fruits.
- Keep extra graham crackers on hand for topping or serving alongside.
Equipment Needed
- Cutting board: A clean surface works well too if you don’t have one.
- Spatula or spoon: Use a butter knife if that’s all you have for spreading.
- Sharp knife: A serrated knife is ideal for slicing the rolls.
- Plastic wrap: If not available, use a clean kitchen towel for chilling.

Variations of S’mores Sushi Rolls
- Fruit-Filled Delight: Add thin slices of bananas or strawberries for a fresh and fruity twist. The sweetness blends wonderfully with the chocolate and fluff.
- Nutty Surprise: Mix in some chopped nuts, like almonds or pecans, for added crunch and flavor. This will elevate your rolls to a whole new level.
- Chocolate Overload: Replace the chocolate spread with a mix of milk chocolate and dark chocolate for a more intense chocolate flavor.
- Peanut Butter Bliss: Swap some chocolate spread for peanut butter or almond butter. It’s a deliciously creamy alternative that pairs nicely with marshmallows.
- Dairy-Free Option: Use dairy-free chocolate spread and substitute marshmallow fluff with a dairy-free version to cater to dietary needs.
Serving Suggestions
- Pair your S’mores Sushi Rolls with a tall glass of cold milk for a classic combination.
- Serve alongside fresh fruit like strawberries or raspberries to balance the sweetness.
- For a festive touch, plate the rolls on a colorful platter and sprinkle with extra crushed graham crackers.
- Drizzle some chocolate sauce over the rolls for an extra indulgent presentation.
- Consider adding a scoop of vanilla ice cream for a delightful contrast in temperature.
FAQs about S’mores Sushi Rolls
Are you curious about S’mores Sushi Rolls? Here are some frequently asked questions that might help you get the most out of this delicious recipe!
Can I make S’mores Sushi Rolls ahead of time?
Absolutely! You can prep your rolls in advance and store them in the fridge for a few hours. Just cut and serve them right before you’re ready to enjoy!
What can I use instead of marshmallow fluff?
If you’re not a fan of marshmallow fluff, consider using whipped cream or a creamy yogurt alternative. Just remember, this will change the texture and flavor a bit!
Can I freeze S’mores Sushi Rolls?
While I don’t recommend freezing them due to the texture changes, you can keep any leftovers in the fridge for up to two days. Just wrap tightly!
What other flavors work for the filling?
Oh, the possibilities are endless! You can experiment with fruit jams, peanut butter, or even a cookie butter spread. It’s all about what you love!
How do I get the perfect slice?
To achieve perfect slices without crushing your rolls, use a serrated knife. A gentle sawing motion will keep those beautiful layers intact!
Final Thoughts
Making S’mores Sushi Rolls is more than just whipping up a dessert; it’s about creating moments filled with joy and laughter. Each bite wrapped in that delightful sushi-style roll reminds me of summer nights by the campfire, with the sweet aroma of roasting marshmallows wafting through the air. It’s a fun and easy recipe that brings everyone together, sparking stories and smiles. Whether you’re treating the kids or impressing guests, these rolls never fail to delight. So, roll up your sleeves and dive into this culinary adventure; it’s time to savor those beautiful layers of flavor!
Print
S’mores Sushi Rolls
- Prep Time: 15 minutes
- Cook Time: 0 minutes
- Total Time: 15 minutes
- Yield: 4 servings 1x
- Category: Dessert
- Method: No-bake
- Cuisine: American
- Diet: Vegetarian
Description
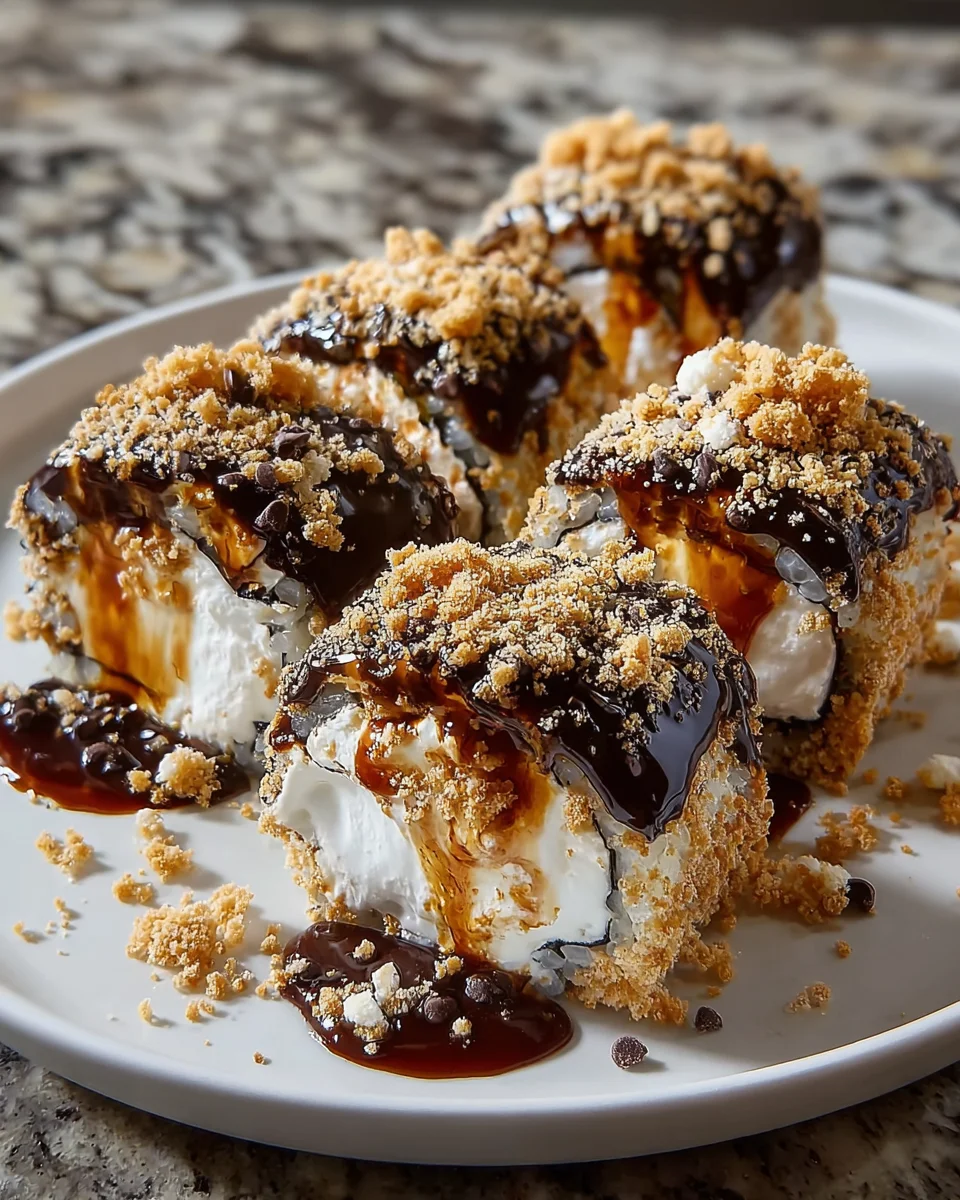
S’mores Sushi Rolls are a fun and creative twist on the classic s’mores treat, combining the flavors of marshmallow, chocolate, and graham crackers in a sushi-style roll.
Ingredients
- 4 flour tortillas or crepes
- 1 cup marshmallow fluff
- 0.75 cup chocolate spread or melted chocolate
- 1 cup graham crackers, crushed
- 0.25 cup mini chocolate chips (optional)
Instructions
- Lay tortilla or crepe flat on a clean surface.
- Spread marshmallow fluff evenly, leaving edges clear.
- Add chocolate layer and sprinkle with crushed graham crackers.
- Roll tightly into a log and chill briefly.
- Slice into rounds and serve.
Notes
- For a gluten-free option, use gluten-free tortillas or crepes.
- You can substitute the chocolate spread with Nutella or any preferred chocolate hazelnut spread.
- Add fruits like bananas or strawberries for extra flavor.
Nutrition
- Serving Size: 2 rolls
- Calories: 300
- Sugar: 20g
- Sodium: 250mg
- Fat: 12g
- Saturated Fat: 5g
- Unsaturated Fat: 7g
- Trans Fat: 0g
- Carbohydrates: 45g
- Fiber: 2g
- Protein: 4g
- Cholesterol: 0mg